FINALLY! My ruffled duvet cover is done and I’m so excited about it! Since this project was so detailed and took me a long time, this post is going to be pretty long too, but I wanted to make sure to include the whole process.
So here’s the back story… I needed a new bedspread for my room in my apartment, since the one I used last year is twin size and my new bed is going to be full size. I searched and searched online, but didn’t find anything I liked. I’m super picky when it comes to things like that… I did, however, find quite a few images and tutorials for ruffled shower curtains, like Anthropologie’s Flamenco Shower Curtain, and thought that a similar idea would be great for a duvet cover! Now, I love duvets because I can put an extra fluffy insert inside them and snuggle down into the comfy puffiness of my bed each night, but my mom pretty much hates them. She thinks they’re lumpy and annoying. Even though that is sometimes (or oftentimes) true, I loved the ruffled look so much that I decided a duvet cover was what I was going to make.
Luckily, after a quick Pinterest search, I discovered many other people had the same idea as me. And the best part? There were tons of tutorials about how to make my own! None of that frustrating trial-and-error part that comes along with figuring things out by myself. Of course, I could have just ordered the Waterfall Ruffle Duvet Cover from Urban Outfitters, but where’s the fun in that? Plus, I had a fancy ruffler foot that I hadn’t yet had the chance to use and this seemed like the perfect project for it! I found two different inspirations for my own ruffled duvet. Polka-Dotted Pearl made her Ruffled-Up Duvet in yellow, which I loved! Also, her puggle is sleeping on the bed in her pictures and since I have a puggle too, it was clearly meant to be! I sort of combined her idea with See Kate Sew’s Ruffled Up Comforter Cover to create my own version. I loved the lightness of the ruffles that came from using voile instead of cotton and she had quite a few useful tips in her post, as well. So! Here’s how I made my own ruffled duvet!
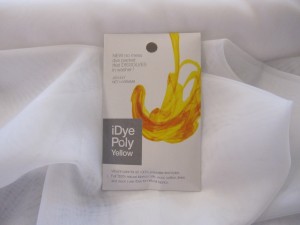
First, the fabric… I decided to use voile, but the unfortunate part was that Joann’s only carries it in white… Maybe that’s the only color voile comes in..? So I decided to dye it yellow myself. The fabric was 40% off and I bought 8 yards (it was 118 inches wide, not the typical width). I got to take it out of the store rolled up on a tube because there was so much of it. I also bought a couple packages of iDye Poly dye in Yellow since voile is 100% polyester. There were much better color options for non-polyester dye, but apparently those don’t work with voile, so plain yellow it was.
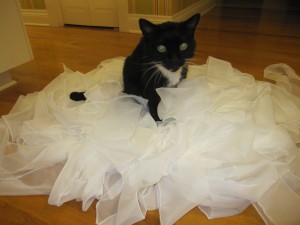
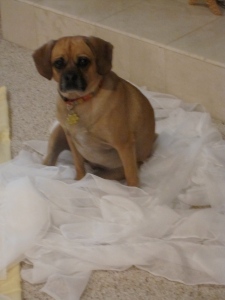
I am one of those people who once an idea is in my head, I have to start working on it, so as soon as I got back from Joann’s I started my duvet. The voile I ripped (SO so so much easier and faster than cutting, plus it was kinda fun) into 5 inch wide strips. There were about 50 strips total. Smokey and Daisy couldn’t resist the pile of fabric…
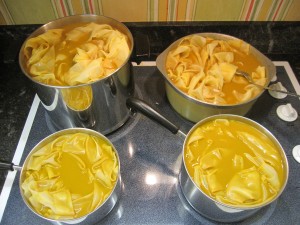
After that was all figured out, it was time to dye! To dye polyester, you have to simmer the fabric in the dye on the stove. Since I had so much fabric, I had to use four of the biggest pots we had and do the strips in two batches. Definitely the weirdest thing I’ve ever cooked before. I stirred them pretty much constantly for about 45 minutes until it got to the color I wanted. Then, into the washing machine and dryer (on low) they went!
Next came the ruffling. And more ruffling. And more ruffling. But ruffler feet are SO cool and mine definitely made this part of the project much easier, even if it still took me hours. I ended up using the same settings as Kate at See Kate Sew: the deepest pleats (setting 18) every 6 stitches. I decided not to serge or hem the edges because ripping them made them kind of curl under and I liked the way they looked. Conveniently, that made less work for me! Once I had converted the strips into ruffles, I began laying them onto a yellow queen-sized flat sheet and pinning them into place. I used a queen-sized sheet so the completed duvet would hang over the sides of the bed more so than the full-sized sheet would. I overlapped the ruffles by about three inches. They were not long enough to reach all the way across the sheet, so I had to use another ruffle to get to the end, then continued with the rest of that ruffle on the next row, etc. Remember to work from the bottom!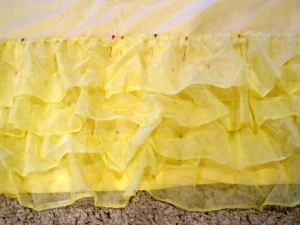
After I had pinned about five rows, I took it to my sewing machine and stitched them on! It’s a little bit tricky to maneuver that amount of fabric through the machine and a few times I accidentally sewed the sheet to itself (whoops), but with some practice it gets a little bit easier. One plus to all the ruffles though is that they are very forgiving, so my less-than-expert sewing skills were just fine!
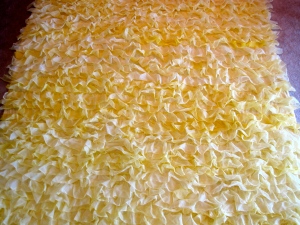
Eventually, after lots and lots of sewing, this is what you’ll have!
And you will be beyond excited that you are finally done sewing ruffles. The ruffles were really wrinkly from being folded and scrunched, so I decided to steam the whole thing and it looked so much better afterwards! Now the top layer of the duvet is done, which is also by far the hardest and most time consuming part.
For the bottom of the duvet cover, I used another yellow queen-sized sheet, pinned it, and sewed three sides shut. Along the bottom I used iron-on Velcro to make the closure. Then I put the duvet insert inside and it was finally done! And it looks so pretty and exactly how I wanted it to! So very exciting.
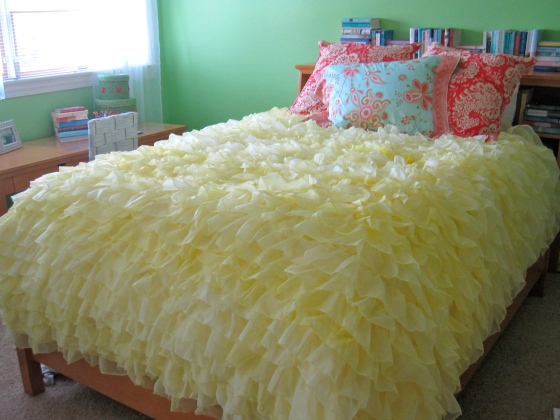
Now, this is a picture of it on my bed at home, so the pillows are the ones that match my current bedspread. I’m going to make shams and new pillows that will match my new one soon! I hope you love it as much as I do!
Wow!!! I LOVE this!!! 🙂
Thank you! I worked really hard on it!
Stop. This is so friggin cute. Great job Becc!
Thanks 🙂 I’m obsessed!
Wow, that is so awesome. I love how it turned out!
Thank you 🙂 I do too!
This looks SO good!!!!! Yay! It’s done!
Ooh I love it! How can you go wrong with yellow and ruffles! Too cute!
Pingback: Shams to Match the Duvet Cover « With Scissors and a Spatula
This is SO worth the effort–it is STUNNING! Great job!
X,
Kelly
that looks like a ton of work – but so totally awesome!! Thanks for sharing the how-to’s, I pinned this!
Thank you! It definitely was a lot of work, but it was worth it!
Pingback: Decorative Pillows « With Scissors and a Spatula
I’m new to sewing and I wanted to know when you sewed on the bottom of the duvet cover, how did you do it so that your ruffles didn’t get caught in the stitches?
I placed the top ruffle-y piece and the bottom piece right sides together (so it’s inside out) and pinned it so that the edges of the ruffles were pinned in between, so my ruffles are actually sewed down on the edges. I just was careful to make sure the ruffles were facing the right direction and smoothed down before I pinned and sewed it. Really the only reason I did it that way was because it seemed easier! If you don’t want them sewed down though, I’d probably pin them over out of the way before pinning and sewing the bottom piece on. I hope that helped! I was definitely new to sewing before I started this project and it really helped to develop my skills, so hopefully it will help you too! Let me know if you have anymore questions! Good luck!!
Thank you, definitely helpful. I think I’ll start with a few envelope pillows,etc. first and work my way up to a project like this 🙂
It looks great!! Just wondering….would it be machine washable?
Yep! I’ve washed it! I ran it on low in both the washer and the dryer. Some strings came off the ruffles, but I just trimmed them off and it was fine.
Awesome job. Beautiful, fantastic! BTW, I like the contrasting pillows with the ethereal ruffles, even though you said you planned to make new. I have several sewing projects stacked up on the table and waiting for me (for like ever) … nothing spectacular like your project … but you might have just inspired me to go spend some time with the sewing machine 🙂
Robin @ happilyhomeafter.blogspot.com
THAT is one beautiful duvetcover….love it!!!! Must have been an aweful lot of ruffling lol 🙂
Just wondering… have you washed it yet? and if so how did you go about that 🙂 i’d be so afraid mine would fall apart!
I have washed it! On a gentle cycle. I was a little scared too, but all that really happened was a few tangles of strings that came off of the ruffles. I snipped them off and it was fine!
Awesome!!! I’m going to make one for my dorm but I plan to sew the ruffles to a white quilt I already have so it will be thicker!
That sounds like a good idea! Good luck!
Was there a certain tutorial you used that was more step by step?
No, unfortunately most of it I just made up as I went along. The see kate sew tutorial (linked on this post) was the most detailed one I used. Sorry!
How much did it cost to buy all the voile and did you end up using all of the 8yds, i plan on doing a blanket just like this so i want to know how much i should approximately get.
I used just about all 8 yards. I pretty much only had enough to put a ruffle around two pillow shams, with a few leftover strips that I didn’t use because they dyed a little funny. To use less, you could space your ruffles out a little bit more. I think I remember there being three different voiles at three different prices. I chose the middle-of-the-road one and think it was around $8 a yard, but it was also 40% off. Good luck!
Amazing Tutorial !! You did a fabulous job…